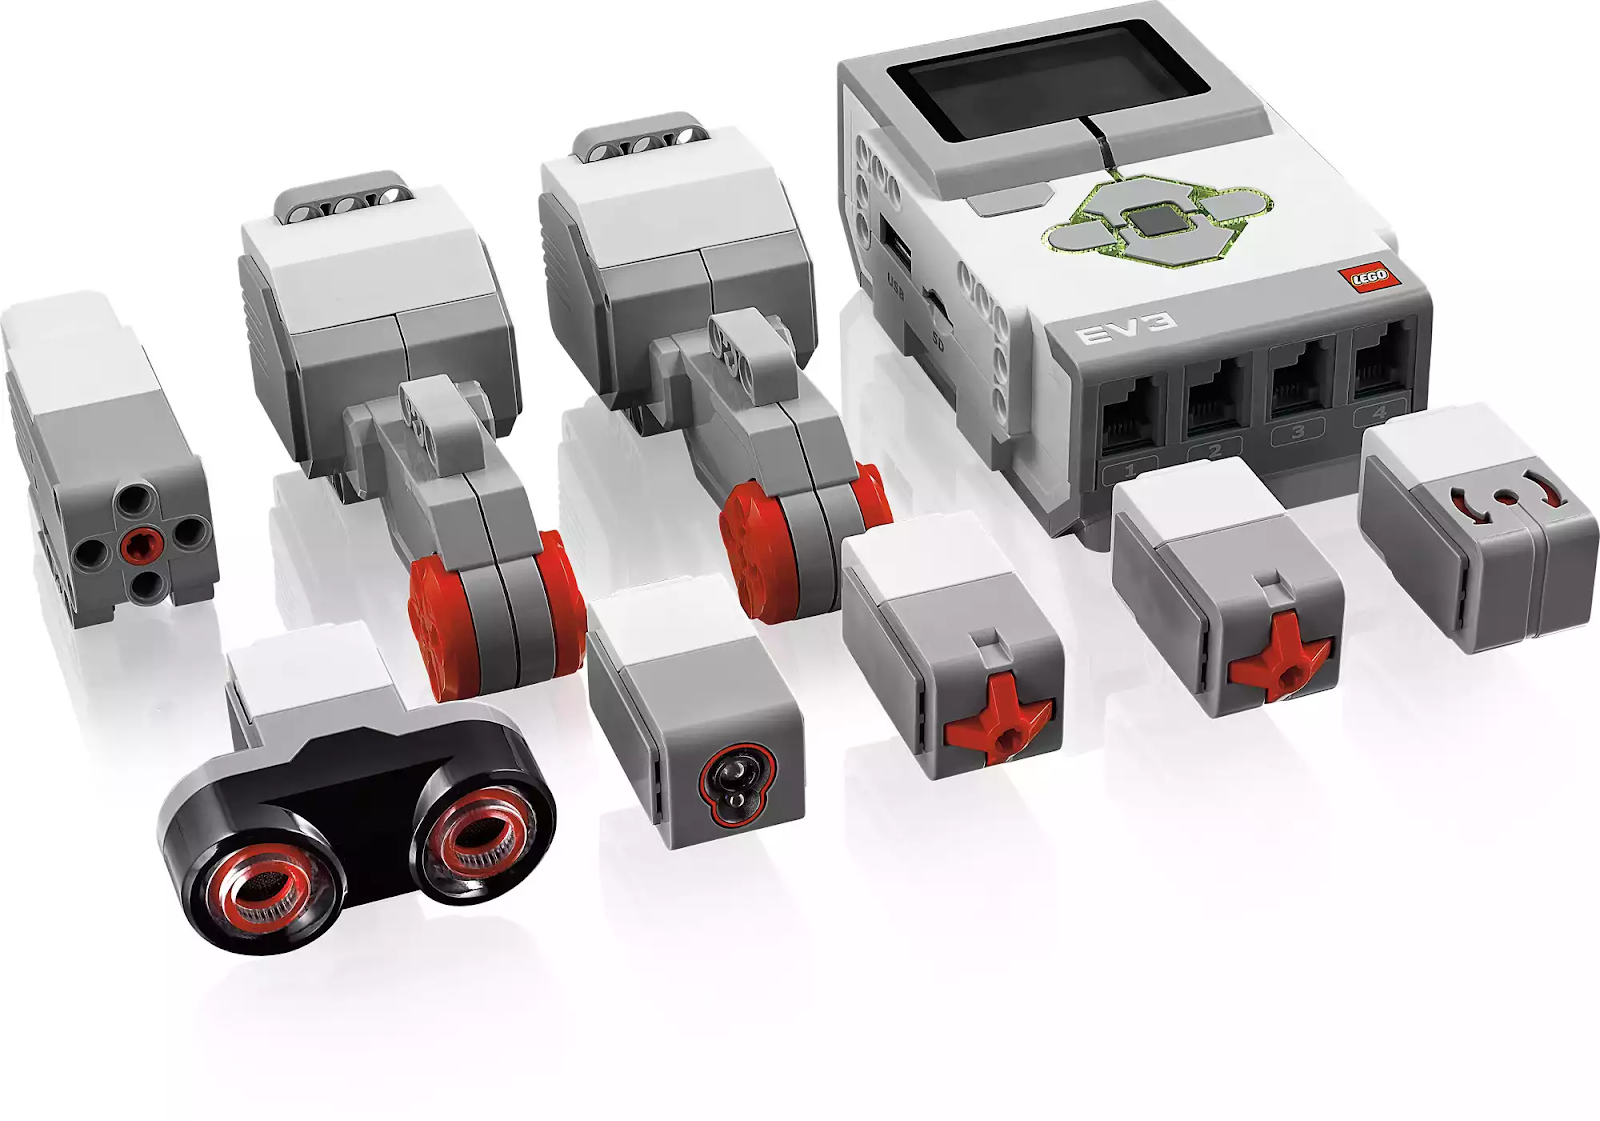


IntroductionThis project will demonstrate how to update Lego EV3’s 3 color, ultrasonic and touch sensor status on your AI2 screen. Notice: You don’t have to write any program for EV3, just power it on and pair with your Android phone. App Inventor’s EV3 components are talking with Lego EV3 brick with a special protocol called Lego EV3 Direct Command. These commands are actually byte arrays which can be executed directly by Lego EV3 brick. App Inventor Gallery of this project HardwareLego EV3 Robot SensorsLego EV3 Robot has 5 different kinds of sensors, including:
Figure 1. Lego EV3 core components Note: There are encoders within EV3’s motors. We’ve included the GetTachoCount function in EV3Motors component. We will discuss this function in later topics. Power on your EV3 and pair it with you Android phone (default key: 1234). You can check whether robot’s EV3 is on by the bluetooth icon at the upper-left screen corner. App InventorThis app will update Lego EV3’s sensor value (color sensor, touch sensor and ultrasonic sensor) value on screen. DesignerPlease add these components and place them as shown in Figure 2. Details please refer to Table 1.
.png) Figure 2. Designer
Table 1. Required components of this project
BlocksSTEP1 Preparation First we need to set ListPicker1.Elements to BluetoothClient1.AddressAndNames, therefore we can choose the paired EV3 brick in this ListPicker. In ListPicker1.Elements.AfterPicking event, we connect with what we chose (ListPicker.Selection). If connect successfully, then activate Clock.Timer and set Screen.Title to “Connected”. .png) Figure 3. Use listpicker to select paired bluetooth device. STEP2 Show sensor value regularly In Clock1.Timer event, we are polling sensors status 5 times per second. Then use each sensor component’s related function to get sensor status. For ultrasonic and color sensor, we simply show the value directly on Textbox. And we have one special button to change its background color according to whether the touch sensor is pressed or not. .png) Figure 4. Updating sensor value 5 times per second STEP3 Disconnect When Button_Disconnect is pressed(Button_Disconnect.Click event), we ask BluetoothClient to disconnect from EV3 brick, disable Clock Timer and set related message on Screen title. 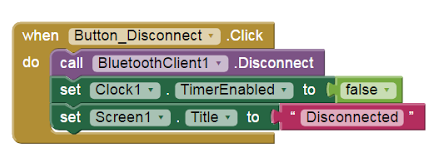 Figure 5. Disconnect from bluetooth device PlayYou must pair with your EV3 robot first, then press its power button and check EV3’s BT is switched on. Press the [Choose your EV3] listpicker and choose the name of the paired EV3, you should see varying number on your screen. Try to press Lego EV3’s touch sensor to check whether the button has been red or not~
|