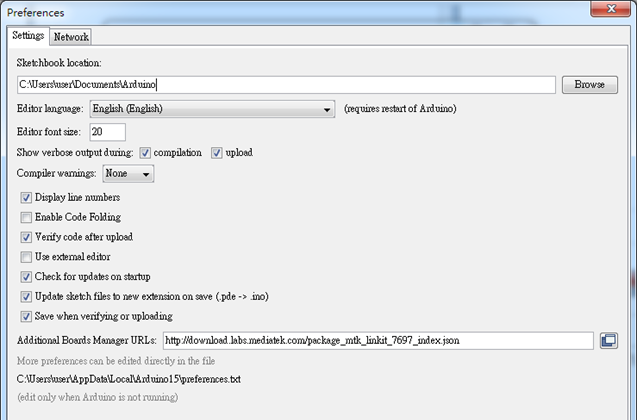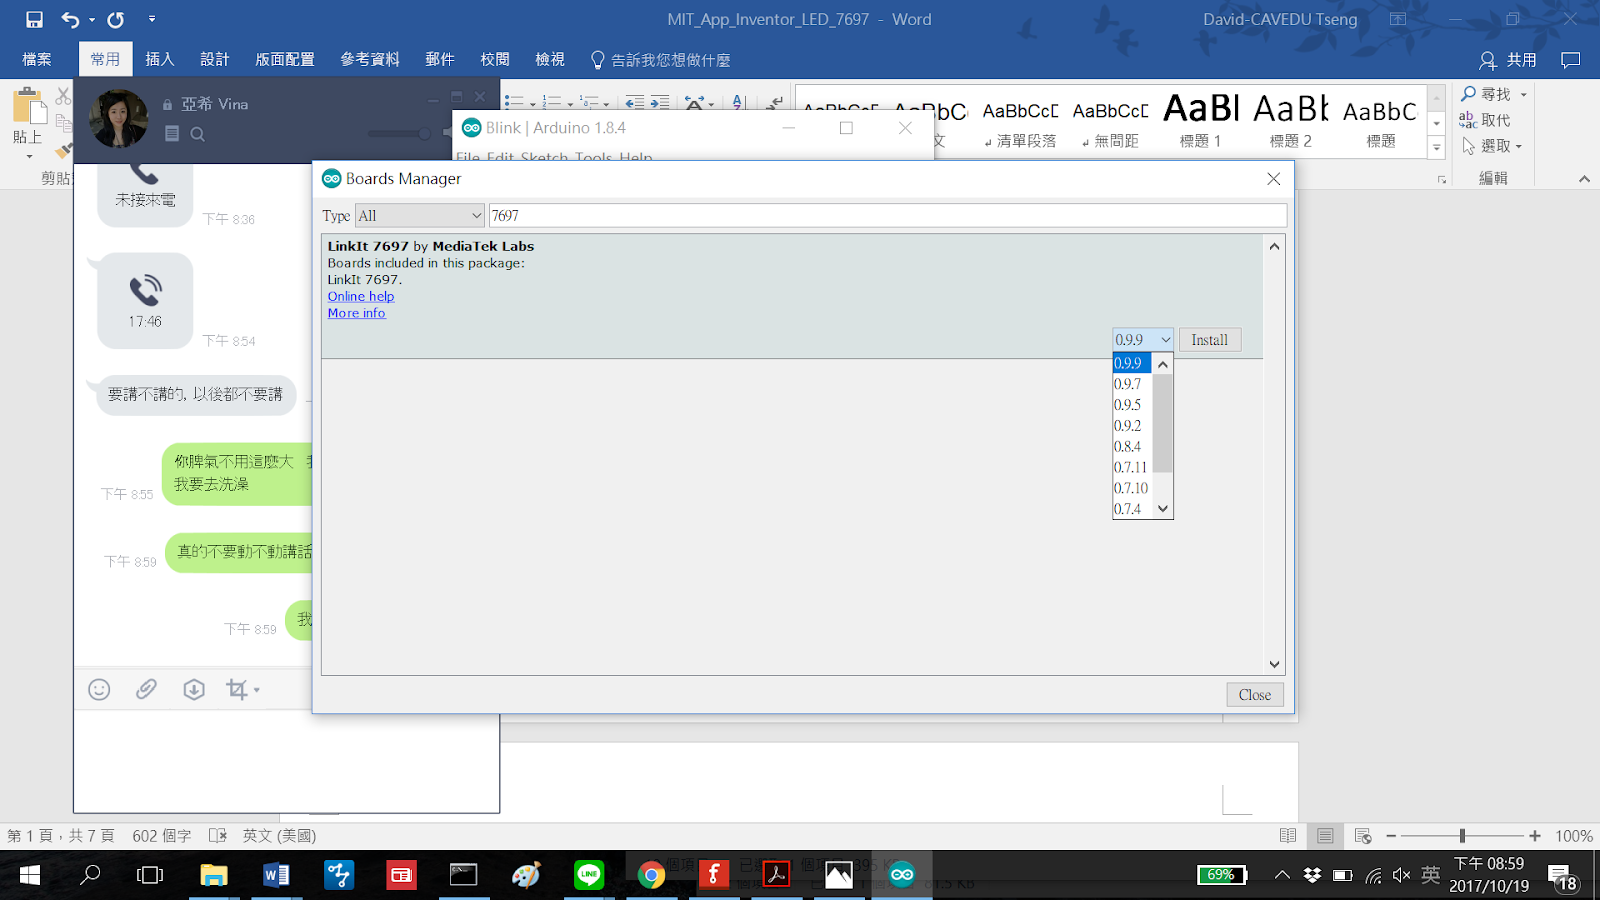


Level: advanced This tutorial will help you get started with App Inventor + IoT, controlling LinkIt 7697 (Arduino compatible) to control a RGB LED with four different colors by buttons on your app. Hardware LinkIt 7697 is an Arduino compatible dev board with Wi-Fi / BLE. You can use it to interface with App Inventor through its BLE communication. Arduino IDE Setup
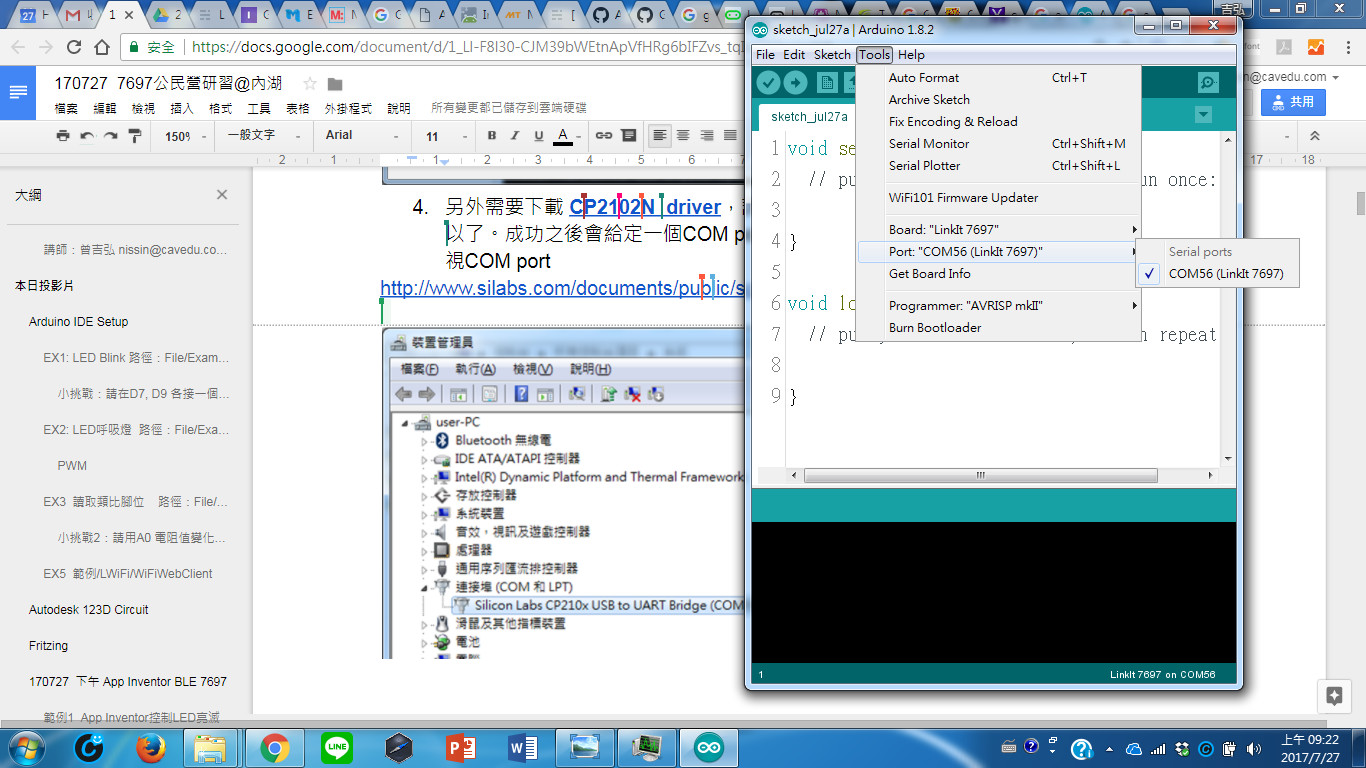
Finally, go back to the Arduino IDE, check to see if it recognizes your LinkIt 7697 successfully in the Tools/Port menu. For MAC users, it should be something like “/dev/tty.usbserialXXX…” For Windows users, it should look like the figure below. Hardware Assembly In this project, we are going to control a RGB LED by App Inventor, which actually are three different color LEDs (red, green and blue) integrated into one. Here are the components you need for this project:
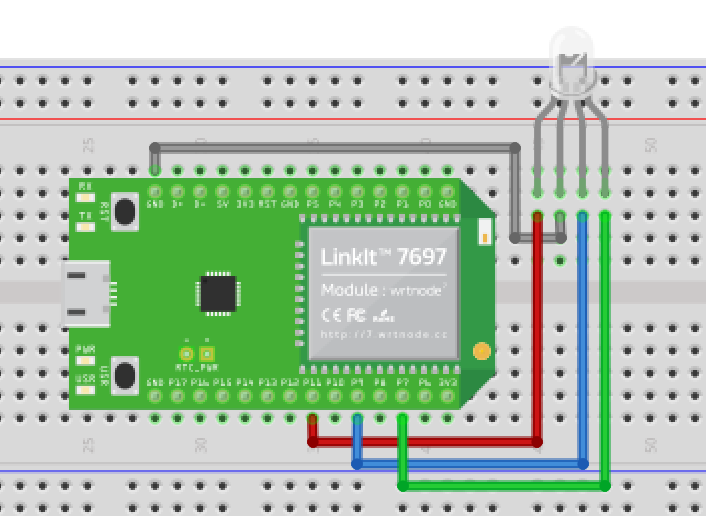
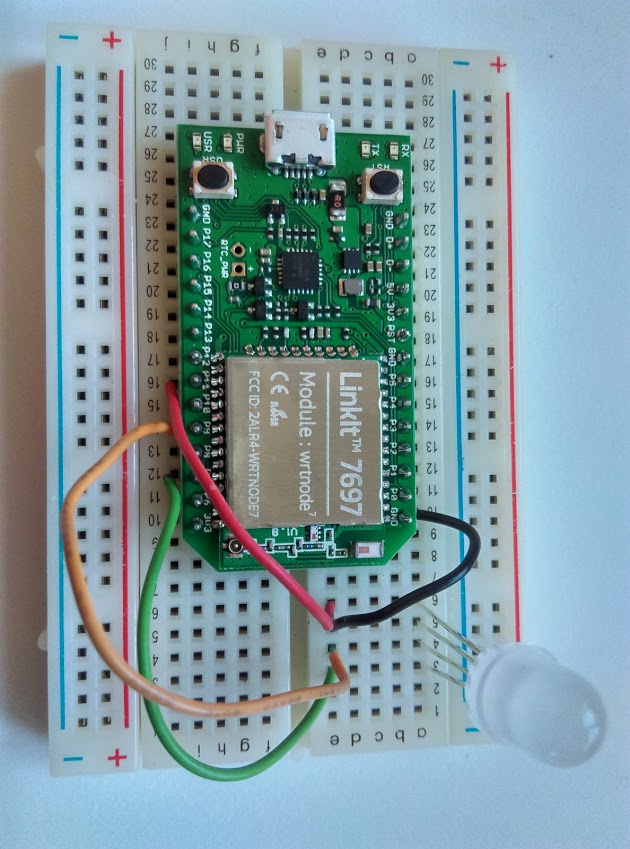
First, connect LinkIt 7697 and RGB LED on the breadboard, and use wires to connect all the components according the table.
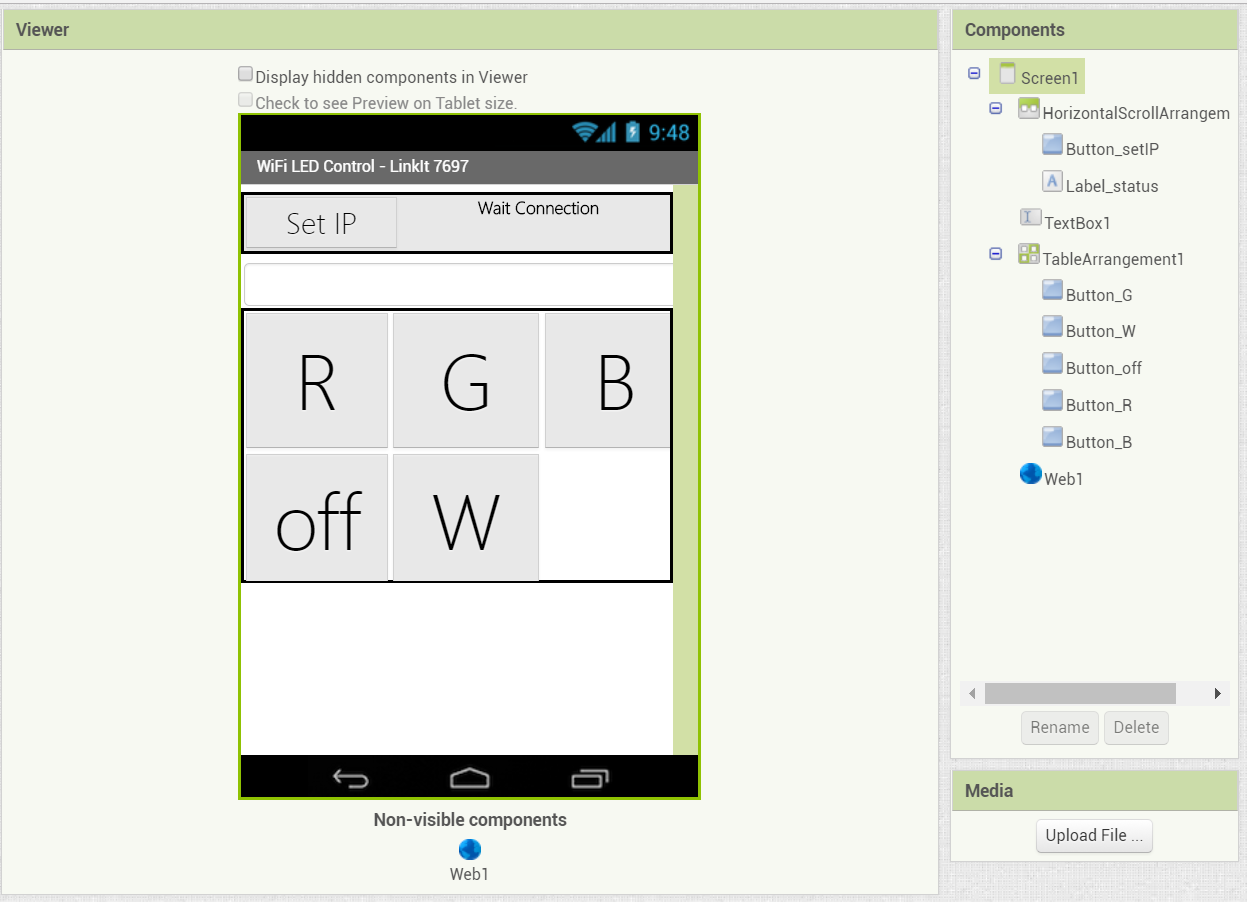
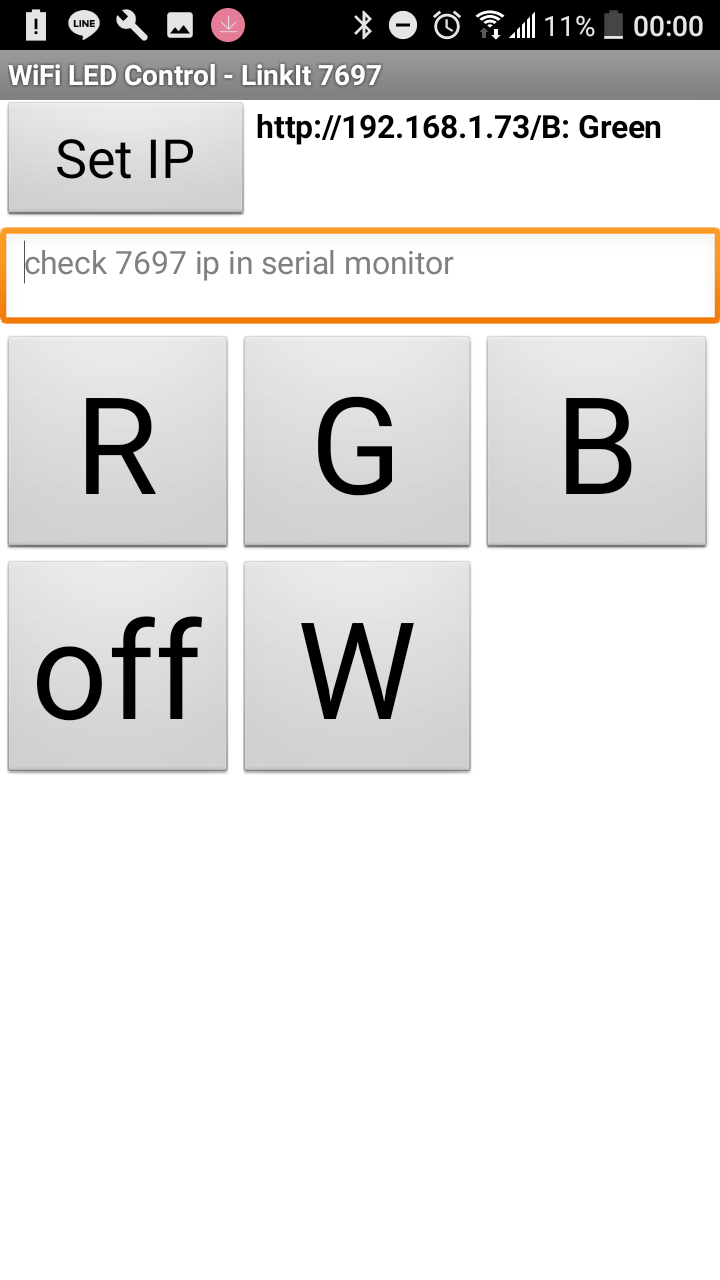
Your finished project should look like the picture below: Physical photo of this project: added later . App Inventor The purpose of this project is to control an RGB LED on your LinkIt 7697 board to shine in four different colors with App Inventor via Wi-Fi. The four colors are red, green, blue and white. The main idea is that App Inventor will open LinkIt 7697’s URL with different command, this will lights up the LED in different colors.
Now log in to your MIT App Inventor account and create a new project.
Designer
Then add it to the project by dragging it into the Viewer.
After some adjusting, your designer should look like this. It doesn’t have to be exactly the same, feel free to modify the color and placement of buttons: Blocks
Let’s take a look of our blocks step by step:
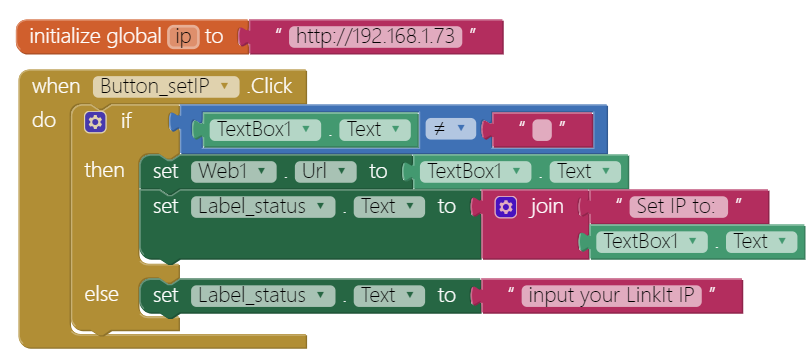
Please replace the value with what you get from Arduino’s Serial Monitor. This is LinkIt 7697’s IP address after connection to the Internet.
Button_setIP is used to update LinkIt 7697’ IP. This is very convenient when you want to control more than one LinkIt board. When you click the button (Button_setIP.Click event), it will check whether the TextBox is empty. If so, then it will set the Textbox’s content to the Web component’s Url (LinkIt 7697’s IP address). If not, it will show a message that tells the user to input LinkIt IP in the form of "XXX.XXX.XXX.XXX", such as "192.168.1.73".
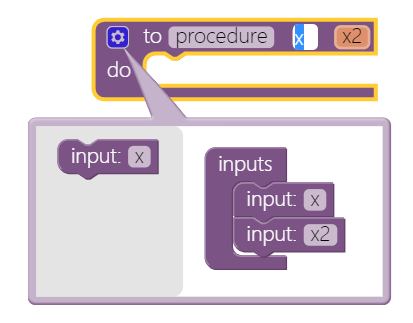
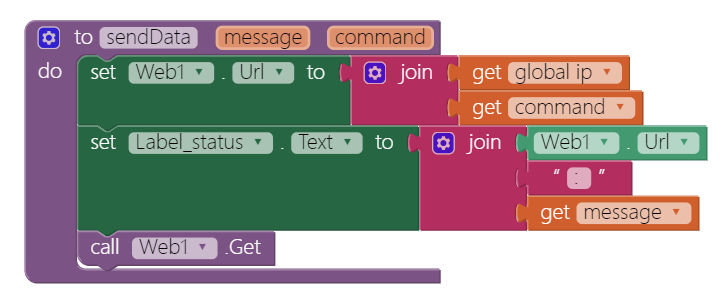
Here we use a procedure to manage what we send and message update when we click each button. Please add a procedure and click the blue gear to add two parameters. Rename this procedure to "sendData", and two parameters as "message" and "command", which means the message parameter is used to update the label and command parameter is used to send different command to LinkIt 7697. The command parameter of the sendData procedure will be combined with the IP variable into a complete URL, like "http://192.168.1.73/R." The last letter is a different command sent to LinkIt 7697. Finally we use the Web component to get this URL, by sending out a specific text to LinkIt 7697.
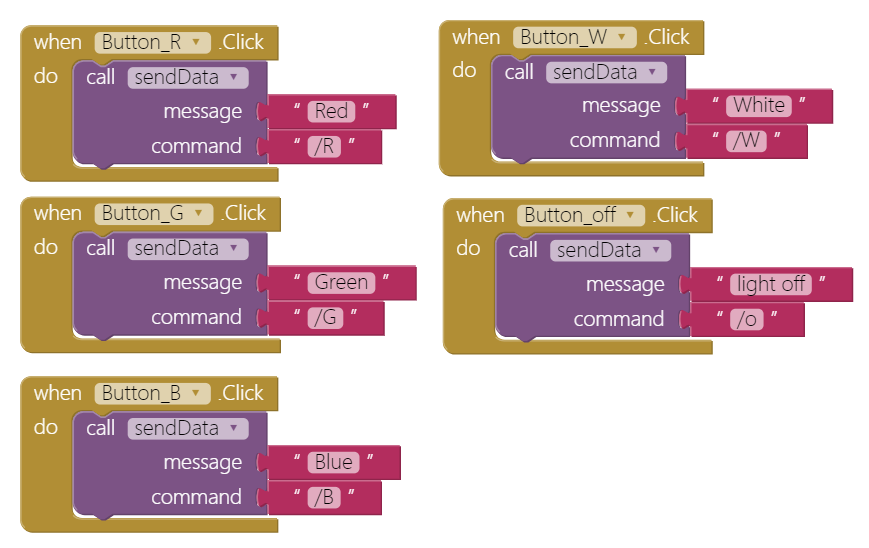
Every time we click a button, we are calling sendData procedures with different parameters. Using procedures will make your code easier to read and manage.
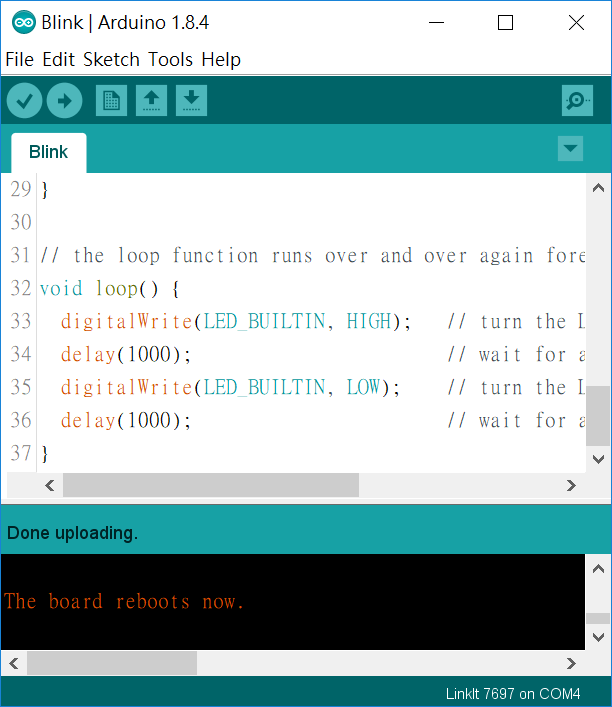
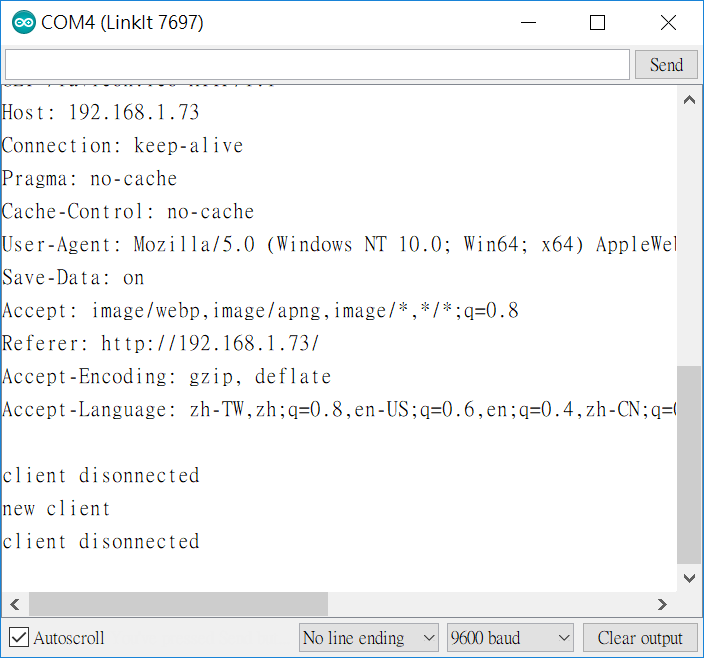
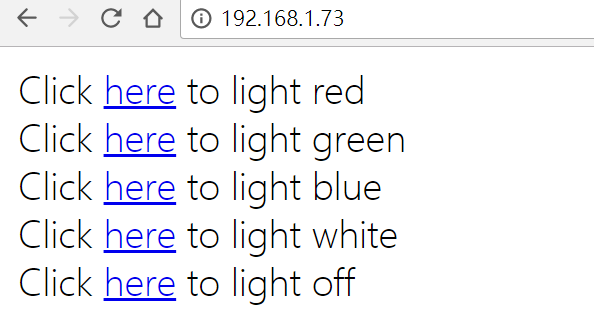
Arduino code Please download code here and upload to your LinkIt 7697. Press the "Upload" right-arrow button, this will compile and upload the Arduino sketch in Arduino IDE to your LinkIt 7697. Please make sure you see the "done uploading" message in the console below. Tips Make sure your LinkIt 7697 is running correctly as a Webserver. Open Serial Monitor in Arduino IDE, check the IP address of your LinkIt 7697. Modify App Inventor’s IP variable value with this, then click each button to see the different colors lighting up! Outside of App Inventor, open a web browser with LinkIt 7697’s ip address and you can see a webpage hosted by LinkIt 7697. Click each "here" to control the LED light color. Note: Your PC or any device to open this webpage and LinkIt 7697 must under the same network. Tips Open your app. You can see messages in the lower left corner of the screen when you have set the IP correctly. Click the buttons to light up different colors and the label in the upper right hand corner will show corresponding messages. Brainstorming
|